Walking into a paint store with nothing but a vague idea in your head is a recipe for buyer’s remorse. The color that looked perfect online turns muddy on your wall. The fabric you ordered shows up too stiff for curtains. This is where interior design samples earn their keep, they’re your insurance policy against expensive mistakes. Whether you’re planning a full renovation or freshening up a single room, collecting the right samples before you commit saves time, money, and frustration. Here’s how to use them like a pro.
Key Takeaways
- Interior design samples let you test actual colors, textures, and finishes under your home’s specific lighting before making costly purchases.
- Different sample types—fabric swatches, paint chips, flooring, and tile—each reveal critical details that photos and online images cannot show.
- Create a sample board and test materials in the actual room for several days across different lighting conditions to catch undertones and potential clashes.
- Most home improvement stores offer free paint chips and small flooring samples, while online retailers provide affordable peel-and-stick paint samples and fabric swatches.
- Investing $50–$100 in interior design samples upfront can save hundreds or thousands by preventing wrong orders and the need for costly returns.
What Are Interior Design Samples and Why Do You Need Them?
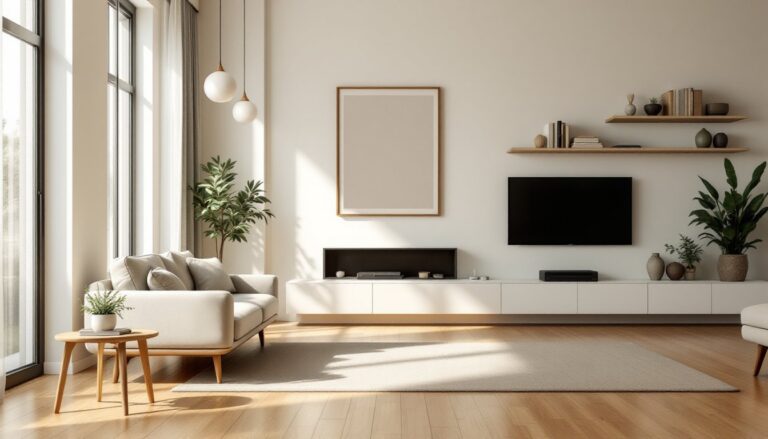
Interior design samples are physical specimens of materials, paint chips, fabric swatches, flooring planks, tile pieces, wallpaper squares, and more. Unlike photos on a screen, samples show you the actual color, texture, weight, and finish under your own lighting conditions.
Here’s why they matter: Your home’s lighting changes everything. A creamy white paint can look yellow under warm incandescent bulbs and stark under LEDs. A velvet fabric photographed in natural light might look completely different in your north-facing living room. Samples let you test materials in the exact spot where they’ll live.
Samples also help you coordinate finishes. You can lay a paint chip next to your existing trim, hold fabric against your sofa, or stack tile samples on your countertop to check undertones. This hands-on approach catches clashes before you order 200 square feet of the wrong thing.
For DIYers managing their own projects, samples provide a reference throughout the job. You can bring your paint chip to the hardware store to confirm sheen, or carry your fabric swatch when shopping for throw pillows. They keep your vision consistent from planning through execution.
Types of Interior Design Samples Every Homeowner Should Collect
Fabric and Textile Swatches
Fabric swatches are small cuttings of upholstery, drapery, or decorative textiles, typically 3×3 inches to 6×6 inches. They show weave pattern, pile direction (for velvet or chenille), colorfastness, and hand feel, how the fabric drapes and moves.
When collecting fabric samples, get pieces large enough to see the pattern repeat if applicable. A tiny 2-inch square won’t show you how a large-scale damask or stripe will read across a full window treatment. Pin samples in place temporarily to gauge scale.
Pay attention to fiber content and care requirements. A linen that requires dry cleaning might not suit a family room with kids. Check the rub count (also called double rubs or Wyzenbeek cycles), upholstery for heavy-use areas should rate at least 15,000 double rubs. Performance fabrics often exceed 30,000.
Many designers incorporate pattern coordination strategies to balance bold and neutral textiles across a room. Test your fabric samples against existing furniture and flooring before committing to yardage.
Paint Chips and Color Cards
Paint chips are disposable cardstock samples showing one or more paint colors. Most paint retailers offer them free, with the actual dried paint printed or coated on one side. Color cards display coordinated palettes, usually three to five harmonious shades.
Don’t rely on a single small chip. Paint manufacturers and design pros recommend getting multiple chips or ordering peel-and-stick samples (typically 8×8 inches or 12×12 inches) that you can move around the room. Tape them to the wall in different areas and observe them at various times of day.
Test both north- and south-facing walls if your room has mixed exposures. Natural light temperatures vary dramatically, north light is cooler and bluer, south light warmer and yellower. A greige (gray-beige) can swing gray in one spot and beige in another.
Before you paint a whole room, invest in a quart-size tester. Roll a 2-foot-by-2-foot patch on the actual wall surface (not a poster board). Let it dry completely, wet paint looks darker, and live with it for at least 24 hours. This step catches problems that chips can’t, like unexpected undertones or clashes with trim and cabinetry.
Flooring and Tile Samples
Flooring samples range from 4-inch-square vinyl tiles to 6-inch or 8-inch sections of hardwood plank or luxury vinyl plank (LVP). Some manufacturers provide full plank samples so you can see length, width, and end-joint detail. For tile, expect 4×4-inch, 6×6-inch, or full-size specimens.
Place flooring samples directly on your subfloor or existing floor. Walk on them with your shoes off to feel texture and slip resistance. Glossy finishes show every footprint and scratch: matte or textured finishes hide wear better. If you have pets, drag a sample across concrete or rough surfaces to test durability.
For tile, check grout joint width. The grout color and spacing can completely change the look, white subway tile with wide gray grout reads rustic, while tight white joints look clean and modern. Some tile shops will create a small mock-up panel with grout so you see the finished effect.
Bring flooring samples home and view them next to baseboards, cabinetry, and furniture legs. Flooring is a large expense, $3 to $15+ per square foot installed depending on material, so it’s worth ordering multiple samples. Many retailers offer design planning resources that help coordinate flooring with other finishes.
If you’re working on a cohesive design scheme, samples should align with principles like visual proportion to ensure the scale and weight of materials balance across the room.
Where to Get Free and Low-Cost Design Samples
Most big-box home improvement stores, Lowe’s, Home Depot, Menards, offer free paint chips and small vinyl or laminate flooring samples. Walk in, head to the paint desk or flooring aisle, and ask. Some locations limit quantities, but you can typically get a handful without issue.
Paint retailers like Sherwin-Williams, Benjamin Moore, and Behr provide free chips in-store. For larger peel-and-stick samples, expect to pay $3 to $6 each. Online services like Samplize and Backdrop sell repositionable paint sheets for about $6 to $8 shipped, which is cheaper than buying quarts of five different testers.
For fabric, visit local upholstery shops or fabric stores. Many will cut small swatches free if you’re considering a purchase. Online fabric retailers, such as Fabric.com, OnlineFabricStore, or specialty decor suppliers, typically send 3-inch memo samples at no charge or for a minimal fee refunded with purchase.
Flooring showrooms and tile shops usually offer samples free or for a small deposit (often refunded if you return them). For high-end or specialty products, engineered hardwood, porcelain tile, natural stone, samples may cost $5 to $20, but that’s refundable or credited toward your order. Some flooring brands ship samples directly from their websites.
For a broader range of inspiration, platforms like Homify showcase finished spaces with design details and material choices. Don’t hesitate to request samples from multiple sources, comparison shopping is how you avoid regret.
How to Use Samples to Make Confident Design Decisions
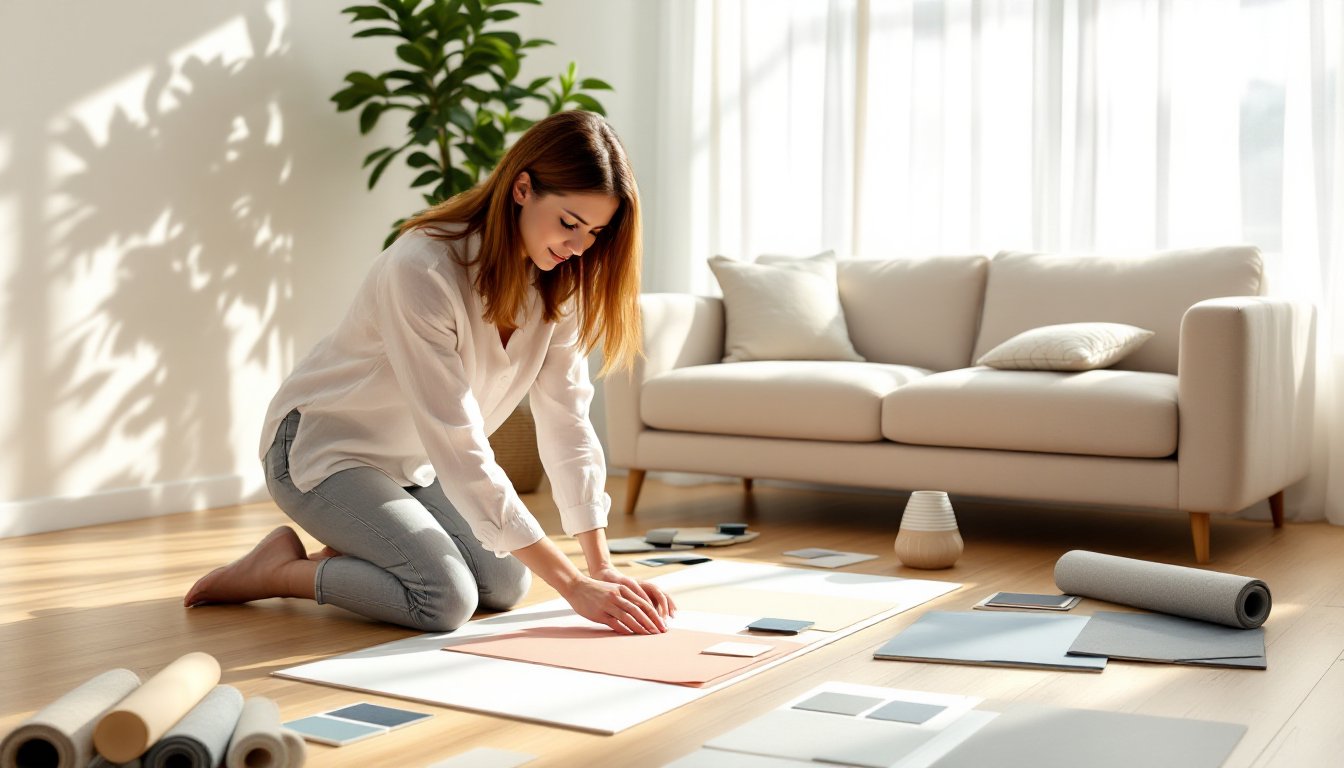
Start by building a sample board or a physical collection in one place. Use a large piece of foam core, poster board, or even a cardboard box lid. Arrange your paint chips, fabric swatches, and flooring pieces together so you can see how everything interacts. This is essentially a DIY version of the presentation boards designers create for clients.
Test samples in the actual room, not in your garage or under fluorescent kitchen lights. Pin fabric to the wall where your curtains will hang. Tape paint chips at eye level on multiple walls. Lay flooring samples on the subfloor in the area with the most natural light and the area with the least. Live with them for several days and check them morning, noon, and evening.
Layer samples over existing finishes. Hold your new paint chip against your current wall color and trim. Place the new flooring sample next to your baseboards. Drape fabric over your existing sofa arm. These real-world comparisons reveal undertones and clashes that you’d never catch in isolation.
When making final decisions, narrow your choices to two or three contenders and order larger samples or testers. For paint, roll a test patch on the actual wall. For flooring, see if you can get a plank or two to lay in sequence, not just a small chip. For tile, request enough pieces to visualize a full square foot with grout lines.
Take photos of your samples in place and review them on your phone or computer. Cameras can shift colors, but photos help you step back and see the bigger picture. Snap images in different lighting conditions and compare side by side.
If you’re planning a larger renovation, consider how your material choices affect overall design costs before you commit. Budget for samples up front, spending $50 to $100 on samples can save you hundreds or thousands in wrong orders and returns.
Finally, when you’re confident, order. Keep one or two samples on hand during installation to confirm colors and patterns match what was delivered. If something’s off, you’ll catch it before the crew is halfway done. That’s the power of working with physical samples from the start.